Here is the transcript of the episode:
Welcome to The Sensitive Kitchen. Where home cooks are inspired to “Cook to Enable Those You Love to Flourish.” I’m Cindy Sullivan, registered dietitian, passionate nutrition, educator, and accomplished home cook. Whether you’re changing, how you cook for food, sensitivities allergies, intolerances, or just trying to eat healthier on a budget. You’re in the right place.
Most episodes, I will share favorite recipes as well as modification, tips and nutrition benefits. Occasionally I’ll have a guest or special episode like modifying holiday favorites. My favorite foods, they’re raspberries and homemade chocolate chip cookies. My latest cooking project was long fermented sourdough bread.
It is a great, canned great Northern bean recipe. It’s quick to prepare. It’s tasty inexpensive.
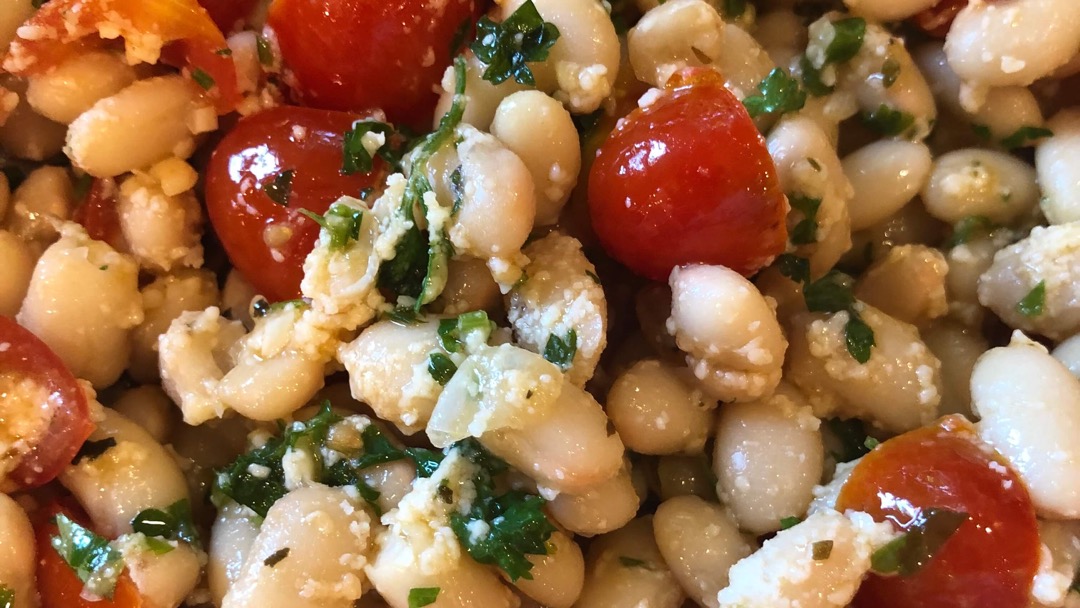
We are going to talk about a fantastic recipe today. Quick White Beans, Tomatoes, Parmesan, and Parsley.
Plus it’s a nutrient powerhouse. It’s loaded with fiber, plant protein, potassium, folic, acid, iron, and even calcium. This recipe ticks all the right boxes. It is my college. daughter’s favorite lunch.
Let me sell you on this recipe for the nutrients it contains.
For 350 calories. you get 200 micrograms of folic acid. That is half of the folic acid you need in a day. Folic acid is especially important for pregnant women. Anyone who’s growing because it’s important in those cells dividing. And most of us don’t get enough. So this supplies, half of your need of this important B vitamin.
A quarter of the recipe, which is only 350 calories gives you 12 grams of fiber. That’s huge. For comparison, a slice of whole wheat bread gives you two grams of fiber and most vegetables give you about three grams of fiber per serving. So 12 grams is huge.
It also gives you five milligrams of iron. That’s half the need of men and post-menopausal women. Premenopausal women, it’s almost a third of your requirement.
It gives you a thousand milligrams of potassium. For comparison of banana gives you 422 and bananas are stellar sources of potassium. You need about 4,700 milligrams of potassium a day. Potassium is going to help prevent high blood pressure, lower high blood pressure, as well as just keep your body running well. So a thousand milligrams of potassium in a quarter, this recipe is huge.
It gives you 21 grams of protein. For comparison, three ounces of beef gives you about 25 grams of protein. So almost as much.
It only gives you about 150 milligrams of sodium. That’s great. You need about 2300 milligrams a day is an upper limit for most people. Some people it’s only 1500 milligrams, if you already have high blood pressure or your sodium sensitive. If you’re an athlete, you can obviously tolerate more,
It gives you about a quarter, excuse me, yeah, a quarter of the calcium you need for the day and about 15% of the vitamin A.
Okay. So it’s packed with folic acid, lots of fiber, a great source of iron, a good source of plant protein, loaded with potassium, lower in sodium, about a quarter of the calcium you need in a day, and some vitamin A.
That’s an amazing recipe for under 350 calories, but how does it taste? It’s great. I already told you my college daughter, this is her favorite lunch. It is really a nice recipe.
This is a recipe where you’re going to do prepare all your ingredients before you ever turn on the stove. Now, the first thing you want to do is mince your garlic.
And let’s talk a little bit about why it’s important to mince your garlic, because you’re going to get additional health benefits by mincing your garlic up front. Most of you are probably aware that garlic has been used for thousands of years in medicine. Many of the properties of garlic are attributable to a compound called allicin. Now, allicin actually isn’t present in whole garlic cloves.
It’s a compound called alliin. And when you break the cell walls, the enzymes that are in the garlic turned the alliin into allicin and allicin is the most potent bioactive. There are many bioactives and garlic, but it is the one that is attributed as being the most potent. You want lots of allicin in your garlic. How do you get it?
You crush the cells either by crushing them with a side of a knife, putting them through a garlic press or mincing them and just letting them sit for five to 10 minutes because those enzymes will work on the alliin and turn it into allicin. So for this recipe, take your garlic and either mince your garlic and let it stand on your cutting board or take your garlic press, press the garlic right into the pan on top of the oil, but don’t turn the pan on. We’re not ready for that yet.
The allicin tends to be fairly heat stable. So after about 10 minutes, you can cook it. And most of it still remains in the garlic. Okay.
So your garlic is chopped and now you’re going to chop your parsley.
In my opinion, this takes the most time in the whole recipe. So I suggest you do that second. There are several ways to cut parsley. You do what works for you, but I’m going to tell you about my favorite method and you can try it and see what you think.
Many people try to just free cut their parsley with their cook’s knife on the cutting board, or they snip it with scissors. Both of those are very popular methods, but to me, they always seem to be more work.
So my favorite method is grab a small bunch of parsley. You discard, of course, any yellow or slimy pieces. You rinse it under cold running water. And if your parsley comes in a bunch, kind of keep those stems together, as you rinse and dry it. It’ll just save you a few minutes going forward.
After you run the parsley under running water, shake it out, Pat it slightly dry on like an old kitchen towel or even a paper towel. Now keep the stems together, gather them like you would like a bunch of flowers, right?
Set them on your cutting board and hold onto those green leafy parts – that would be the flowers if these were flowers. Cut the parsley stems off and discard those. Keep hanging onto those green leafy parts. Now slowly use your knife to cut the parsley into small pieces, working from the end where you cut off the stems, slide your hands slowly toward the other end.
A few pieces will jump out as you do this. That’s okay. Cut those pieces smaller if you desire.
My parsley is cut in just a few seconds, but remember everything takes more time the first 10 times you do it.
I do however find this method much faster than either scissors or random chopping, but you do what works for you.
Next, you’re going to wash and chop your tomatoes. Much of the year when fresh tomatoes are not really in season, I use grape tomatoes. If I’m using grape tomatoes, I cut them in half lengthwise and then half again. So essentially I quarter them lengthwise. And then I cut them either into half or thirds, depending on the size of the tomatoes.
You’re going to open, drain, and rinse your beans. Rinsing will remove about half of the sodium from your canned beans.
You’re going to rinse the outside of your lemon. Cut it in half and squeeze or use a reamer to juice your lemon. You’ll use about half of a lemon and set the juice aside.
You’re finally ready to turn on your stove. Put your oil in your trusty. 12 inch skillet. I adore my All-Clad D5 from Williams-Sonoma. It will last me a lifetime, but whatever skillet you have. It doesn’t even have to be a skillet. You just want something with a fairly large bottom. So if you happen to have a large Dutch oven that will work too.
Put your oil and your garlic in your pan, and when it begins to sizzle, grab your herbs and measuring spoon. The original recipe calls for just basil. I usually use basil and oregano. The last time I put in marjoram, which was delicious.
When your garlic begins to smell about 30 seconds or so, maybe up to a minute, but you don’t want it brown. Add your spices, and stir for about 30 seconds. This lets your spices bloom and gives them even more flavor. Now, this is a point where you want to stir this regularly because you don’t want your spices and garlic burn.
After about 30 seconds you add your tomatoes and beans and you stir.
You can either add the parsley now or just before you turn off the heat – either way is fine.
And while this is heating measure your parmesan. Start with about a third of a cup and set it aside with your lemon juice. As your beans and tomatoes heat, stir it several times.
If you get distracted or it takes a little longer to get to dinner than you expect,and your mixture begins to dry out too much and stick to the bottom of the pan, don’t worry. Add a few tablespoons of water and you’re good to go. I just grab my tea kettle that sits on my stove and pour in a few tablespoons of water. You want them to have a little bit of moisture, a little bit of sauce and not be dry, but it’s not soup. It’s it’s beans that sit on your plate.
When you’re ready to eat, or when the beans are warm, the tomatoes are slightly cooked about five minutes on a medium heat. Take it off the heat, stir in the lemon juice and the Parmesan cheese.
Now you have a choice. If you leave the pan on the burner for a few minutes after adding the cheese, your cheese will melt more and have a less grainy texture. It’s really lovely, but you’ll have a cheesy pan to clean up that will not make you happy to clean. I usually take mine off the burner as soon as I add the Parmesan andserve it up.
Enjoy! This is a quick tasty recipe. It’s delicious. And it’s a nutrient powerhouse.
This is also a very flexible recipe. My daughter uses twice as many tomatoes and doesn’t drain her beans. Use whatever dried or fresh herbs appeal to you. If you’re allergic to dairy or are vegan, try a couple tablespoons of nutritional yeast in place of the Parmesan, or simply leave it out.
If you’re lactose-intolerant however, remember Parmesan is an aged cheese with little lactose left. So you may find you can tolerate the Parmesan in this recipe. It really gives that savory complexity. And then the lemon juice brightens the flavor in this recipe. It’s a wonderful combination.
Let me know if this becomes a favorite in your family too. We love it with steamed broccoli or a soup, like a three ingredient cabbage soup. I haven’t even posted that one yet. And I haven’t talked about it. Someday. I will, but if you want to go check out the recipe on the show notes, it’s at foodsensitivitykitchen.com. I will give that as a special bonus to you and put the recipe up. All the, the basic recipe will be there. Not all the pictures yet.
Thanks so much listening. Have a wonderful day.
I hope you enjoy this recipe and click subscribe because another recipe will be coming your way next week that’s easy, quick, healthy. And if you have not yet taken my cooking framework quiz, I think you might find it helpful to figure out what kind of a framework are you working from when you try to cook for a food sensitive family and change your recipes.
Go over to my website, foodsensitivitykitchen.com and take the cooking framework quiz. You will also find the recipe and show notes at foodsensitivitykitchen.com, episode three.
Thanks so much. Have a good day. Bye bye.
